

Are you yearning for a kitchen makeover without draining your bank account? Look no further! Kitchen cabinet refinishing on your own is a great way to reinvent your culinary kingdom, and we’re here to show you how to give it a try. After all, why hire professionals when you can embark on this adventure yourself and maybe, just maybe, achieve impressive results? Welcome to our guide on how to do kitchen cabinet refinishing like a professional.
The Joyful Journey of Cabinet Refinishing
Picture this: your kitchen cabinets are the darlings of your cooking domain. However, let’s face it, they’ve seen better days. Instead of opting for the easy way out, like buying new ones, or hiring a professional painting company, you decide to embark on a journey of “refinishing” them yourself. It’s a cost-effective way to be environmentally conscious and learn a new skill. It may even provide a satisfying sense of accomplishment.
If the mere thought of “DIY” makes you a bit nervous, you can always consider calling cabinet refinishing professionals, like the “JK Paint & Contracting” company in the Portland area. They’ll do all the hard work, and you can get back to more important tasks. But for those who dare to proceed, read on.
Assemble Your Tools
Before you begin this exciting project of cabinet refinishing, gather your supplies:
- A drill or screwdriver
- Cleaning materials – cleaner for grease silicon and wax
- Mixture of Water and Alcohol 50/50
- Sandpaper (various grits) and different padding to be sure not to ruin edges or burn through your primer coats.
- Hepa Vac or your regular vacuum
- Fans for Proper airflow
- Drop cloths
- Painter’s tape
- HVLP (High Volume Low Pressure) Sprayer for fine finishing, or if you don’t have one, paintbrushes and rollers work
- Pre-Prime Adhesion and Sealer Material
- Tinted to match Primer
- Imported Paints designed specifically for Cabinet Refinishing – or just your regular paint – you can see how it goes.
You can probably find these items at your local hardware store or even lying around in your garage from a previous project.
Step 1: Dismantle All the Things

Start by removing cabinet doors, drawer fronts, knobs and handles. Label them to ensure a smooth reassembly. Be careful!
Step 2: Prepare to Make a Mess
")
Masking – mask and cover all openings, walls, ceilings, counters, appliances. Make sure masked lines are perfect or you might get your cabinet primer and paint on your walls and end up painting those too! Also you probably won’t want your kitchen totally masked off for very long, hopefully you can work quickly and efficiently.
Proper preparation is crucial. Clean the cabinet surfaces, then use sandpaper to dull the finish for adhesion. Address any dents and scratches with wood putty for a smoother finish.
Step 3: Prime Time – Don’t put on too much, or too little! You probably know what to do.
Apply a layer of primer suitable for your cabinet material. Allow it to dry.
Sand and Clean.
Step 4: Get Creative with Paint

Choose a paint color that suits your taste. Apply perfect, even coats, and allow them to dry.
If it goes on too light you’ll get an orange peel texture and if you don’t use perfect spray/brush or roller strokes they will really show. If you put it on too heavy you’ll get an unprofessional look and possibly drips / sags.
In between all these coats make sure you have a suitable space to put all these doors and drawers. Dust or debris in the house? Might be a problem. Kids or pets that might touch or knock them down. That would be unfortunate. Be careful not too drop any doors, might be hard to find a perfect replacement.
Step 5: Reassemble

Once the paint has dried, reattach the cabinet doors and hardware. Step back and admire your work. Bravo! You’ve successfully refinished your kitchen cabinets.
Be sure the paint is fully cured, don’t grab it too hard or with dirty fingers.
Interior Painting: Why Stop at Cabinets?

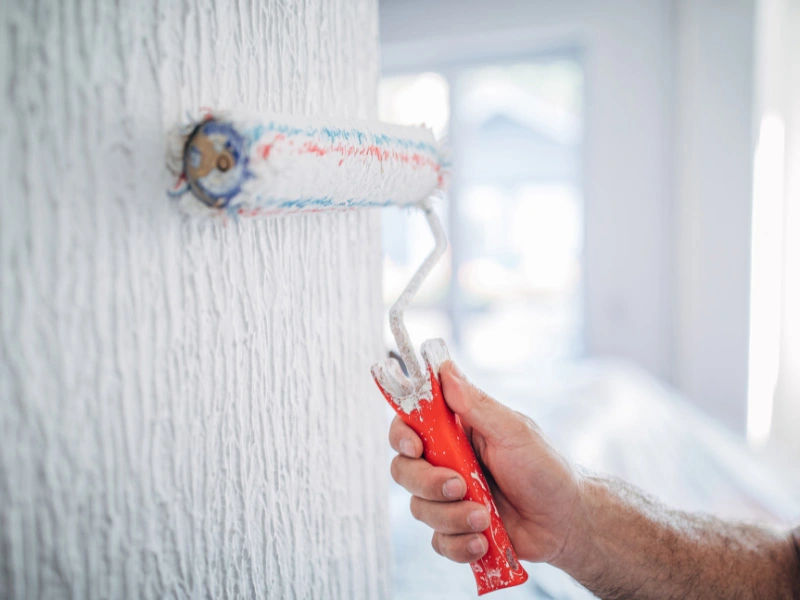
While your cabinets take center stage, remember that your kitchen’s walls are like supporting actors. Consider painting them to enhance the overall look of your space.
Seeking “Cabinet Refinishing Near Me”?
Learning to refinish your kitchen cabinets like a pro can lead to a satisfying transformation. With the right mix of materials, tools, and a dash of determination, you can achieve a great finished product. But, if this DIY adventure isn’t your thing, there are professionals who would love to help you out in the Portland Metro area, like JK Paint & Contracting. The choice is yours, and we wish you the best with your kitchen makeover!
An average kitchen we invest anywhere from 90 to 300+ labor hours when refinishing cabinets. If you do this yourself how long will that take you?
This is an optional statement above guys.
Table Of Contents
The 5 steps to cabinet refinishing
Table Of Contents
The 5 steps to cabinet refinishing
Are you yearning for a kitchen makeover without draining your bank account? Look no further! Kitchen cabinet refinishing on your own is a great way to reinvent your culinary kingdom, and we’re here to show you how to give it a try. After all, why hire professionals when you can embark on this adventure yourself and maybe, just maybe, achieve impressive results? Welcome to our guide on how to do kitchen cabinet refinishing like a professional.
The Joyful Journey of Cabinet Refinishing
Picture this: your kitchen cabinets are the darlings of your cooking domain. However, let’s face it, they’ve seen better days. Instead of opting for the easy way out, like buying new ones, or hiring a professional painting company, you decide to embark on a journey of “refinishing” them yourself. It’s a cost-effective way to be environmentally conscious and learn a new skill. It may even provide a satisfying sense of accomplishment.
If the mere thought of “DIY” makes you a bit nervous, you can always consider calling cabinet refinishing professionals, like the “JK Paint & Contracting” company in the Portland area. They’ll do all the hard work, and you can get back to more important tasks. But for those who dare to proceed, read on.
Assemble Your Tools
Before you begin this exciting project of cabinet refinishing, gather your supplies:
- A drill or screwdriver
- Cleaning materials – cleaner for grease silicon and wax
- Mixture of Water and Alcohol 50/50
- Sandpaper (various grits) and different padding to be sure not to ruin edges or burn through your primer coats.
- Hepa Vac or your regular vacuum
- Fans for Proper airflow
- Drop cloths
- Painter’s tape
- HVLP (High Volume Low Pressure) Sprayer for fine finishing, or if you don’t have one, paintbrushes and rollers work
- Pre-Prime Adhesion and Sealer Material
- Tinted to match Primer
- Imported Paints designed specifically for Cabinet Refinishing – or just your regular paint – you can see how it goes.
You can probably find these items at your local hardware store or even lying around in your garage from a previous project.
Step 1: Dismantle All the Things
Start by removing cabinet doors, drawer fronts, knobs and handles. Label them to ensure a smooth reassembly. Be careful!
Step 2: Prepare to Make a Mess
Masking – mask and cover all openings, walls, ceilings, counters, appliances. Make sure masked lines are perfect or you might get your cabinet primer and paint on your walls and end up painting those too! Also you probably won’t want your kitchen totally masked off for very long, hopefully you can work quickly and efficiently.
Proper preparation is crucial. Clean the cabinet surfaces, then use sandpaper to dull the finish for adhesion. Address any dents and scratches with wood putty for a smoother finish.
Step 3: Prime Time – Don’t put on too much, or too little! You probably know what to do.
Apply a layer of primer suitable for your cabinet material. Allow it to dry.
Sand and Clean.
Step 4: Get Creative with Paint
Choose a paint color that suits your taste. Apply perfect, even coats, and allow them to dry.
If it goes on too light you’ll get an orange peel texture and if you don’t use perfect spray/brush or roller strokes they will really show. If you put it on too heavy you’ll get an unprofessional look and possibly drips / sags.
In between all these coats make sure you have a suitable space to put all these doors and drawers. Dust or debris in the house? Might be a problem. Kids or pets that might touch or knock them down. That would be unfortunate. Be careful not too drop any doors, might be hard to find a perfect replacement.
Step 5: Reassemble
Once the paint has dried, reattach the cabinet doors and hardware. Step back and admire your work. Bravo! You’ve successfully refinished your kitchen cabinets.
Be sure the paint is fully cured, don’t grab it too hard or with dirty fingers.
Interior Painting: Why Stop at Cabinets?
While your cabinets take center stage, remember that your kitchen’s walls are like supporting actors. Consider painting them to enhance the overall look of your space.
Seeking “Cabinet Refinishing Near Me”?
Learning to refinish your kitchen cabinets like a pro can lead to a satisfying transformation. With the right mix of materials, tools, and a dash of determination, you can achieve a great finished product. But, if this DIY adventure isn’t your thing, there are professionals who would love to help you out in the Portland Metro area, like JK Paint & Contracting. The choice is yours, and we wish you the best with your kitchen makeover!
An average kitchen we invest anywhere from 90 to 300+ labor hours when refinishing cabinets. If you do this yourself how long will that take you?
This is an optional statement above guys.
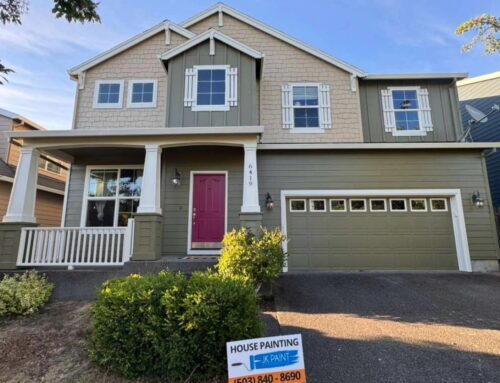
Need A Pro Cabinet Painter And Live In The Portland Metro?
At JK Paint & Contracting, we prioritize customer satisfaction. From the initial consultation to the final coat of paint, we guide you through every step, ensuring a seamless experience. Our extensive experience and professionalism have earned us the trust of numerous homeowners in the Portland Metro area. Let us bring our expertise to your home, delivering exceptional exterior painting services that reflect your personal style and make your home the envy of the neighborhood. Contact us today and let’s transform your home together.


